MKII Toyota MR2 miscellaneous repair How-To articles
This page has info I deemed important enough to have up on the web for reference, but for various reasons felt did not warrant a dedicated page. It's basically a catch-all for short and simple repairs and a reference for part numbers
This page contains:
Fixing a squeaking/creaking clutch pedal
There's a pivot pin and bushing that connect the clutch pedal to the clevis on the master cylinder push rod. With time the bushing wears out resulting in metal-on-metal contact (pedal arm and pivot pin) that makes a very annoying creaking noise every time the clutch is pressed. When this happens, the pivot pin and bushing should be replaced. The info in this section was derived from
this how-to on mr2.com and this thread on the MR2 forums; I merely consolidated the info and added some pictures.
This is a simple repair requiring only a pair of pliers, 15 minutes at most, and $2.50 worth of parts. The parts in question:
90240-08071 Pin, W/hole $1.15
90386-08033 Bushing $1.37
The only tricky part is getting your upper body into the foot well to replace the parts. It helps if you slide the seat back and tilt the steering wheel up. This exploded diagram of the clutch pedal assemble may be helpful in getting your bearings. To remove the old pin and bushing, first remove the hair pin cotter shown below.
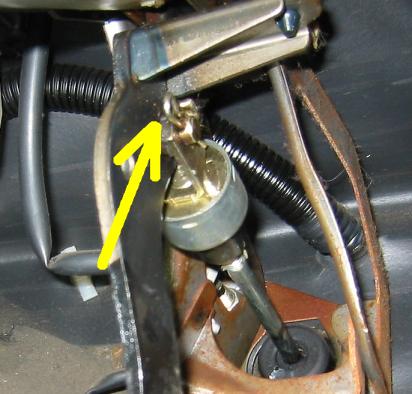
Needle nose pliers work well if you can't get a grip with your bare hands. It will be reused when you install the new pin and bushing. With the hair pin cotter removed, the pivot pin and bushing can be pressed out. Just push on the brake pedal side of the pin and it will pop out. Pull out the old bushing as well.
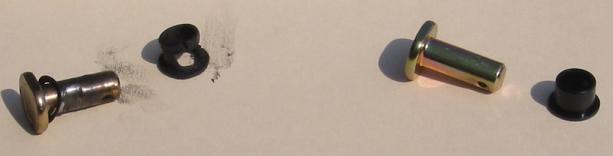
Here's a pic of the parts in question, old parts on the left, new on the right. Notice the groove ground into the old pin.
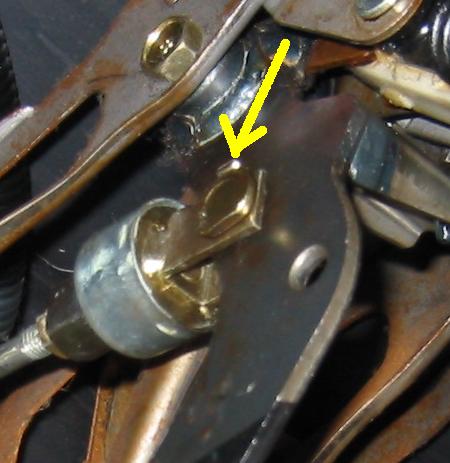
Press the new bushing into the clutch pedal hole, then hold the clevis up and press in the new pivot pin. I put some grease on the bushing to help insert it. Note that the head of the pin is squared off on two sides. There's a tab on the clevis that lines up with the squared off sides to keep the pin from rotating. You'll have to align the pin properly to get it in all the way. The tab is shown below:
Once the pin is in all the way, replace the hair pin cotter and you're done.
Disabling the oil level sensor
The oil level sensor in the oil pan uses a plastic float that's easily damaged, especially when removing the oil pan. A new assembly from Toyota is a few hundred bucks, so I decided to just disable it. If the light doesn't bother you, you can just ignore it. The JDM engines supposedly omitted the sensor entirely, so it's safe to say it's non-critical. If your sensor has gone south, be sure to check your oil level periodically with the dip stick. Checking every time you buy gas is a good idea, even if your sensor appears to be working normally.
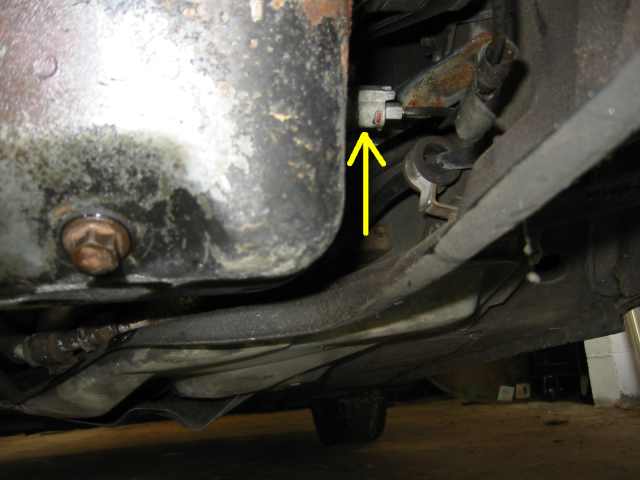
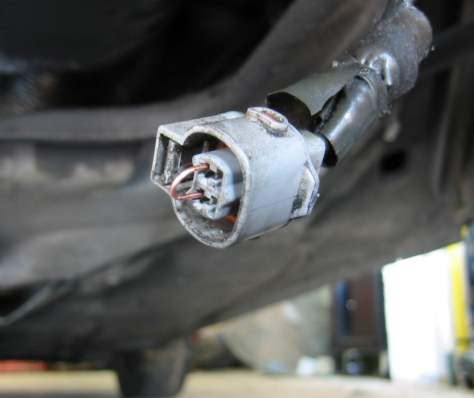
The whole procedure should take less than 15 minutes, including jacking up the car. To disable the sensor, first unplug it from the oil pan. It's a standard gray Toyota connector located on the passenger's side of the pan.
To turn off the light, we simply need to connect the terminals together. I used a short piece of solid core copper wire bent in a "U".
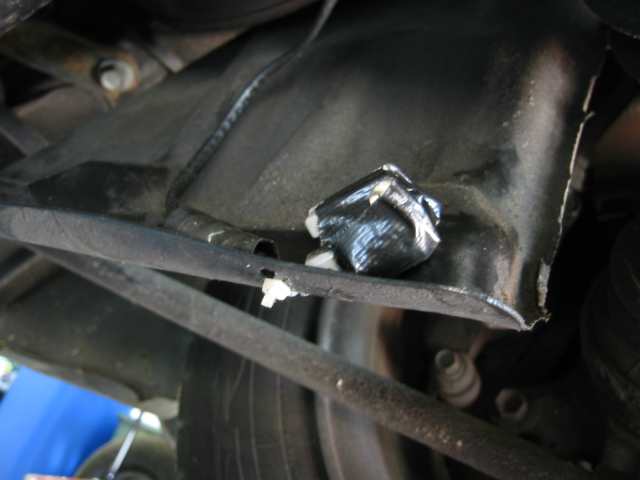
I taped up the terminal end with duct tape to help hold the wire in. It's not a good idea to just leave the terminal dangling, so I decided to secure it to the body. I punched a hole in a nearby plastic underbody fairing with a hole punch and ran a zip tie through the hole and around the terminal.
The light's now off and the process is reversible if for some reason I decide to replace the sensor.
Replacing engine/frunk prop rod clips
The engine lid prop rod clip secures the rod when it's not in use. It's the same part that holds the frunk prop rod. The location of the clips is shown below.
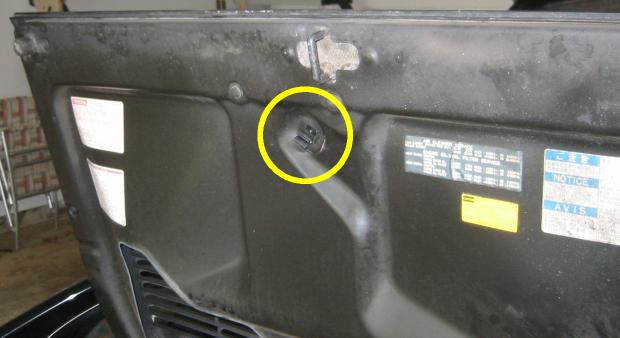

It's common for them to break as they get older. The part number and official name is
53452-17030 HOLDER, HOOD STAY
At $2.84, it makes sense to order a couple, especially if you're buying online and paying for shipping. They simply snap in and can be replaced in a minute or two. A pair of pliers may make removal of the old broken clip a bit easier.
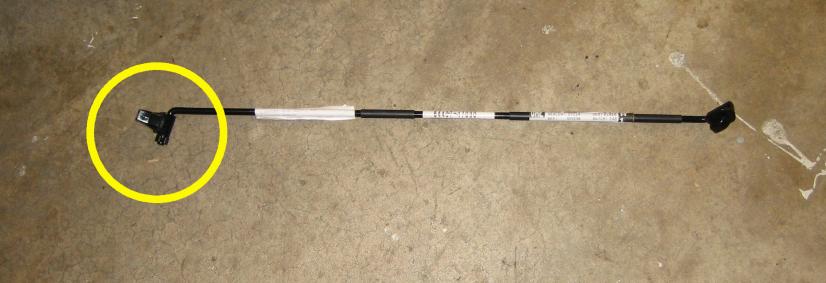
NOTE: If the rod swivel clip breaks, as mine did, it appears the only way to get a new one is to order a whole new prop rod. I couldn't find a separate part number for the swivel clip. The part I'm referring to is circled below, the part number is
64407-17030 SUPPORT SUB-ASSY, EN
Replacing the trim bezel behind the door pull handle
The door trim bezel behind the lock / pull lever has been known to crack and break, especially on earlier MKII MR2s. The replacement part numbers are:
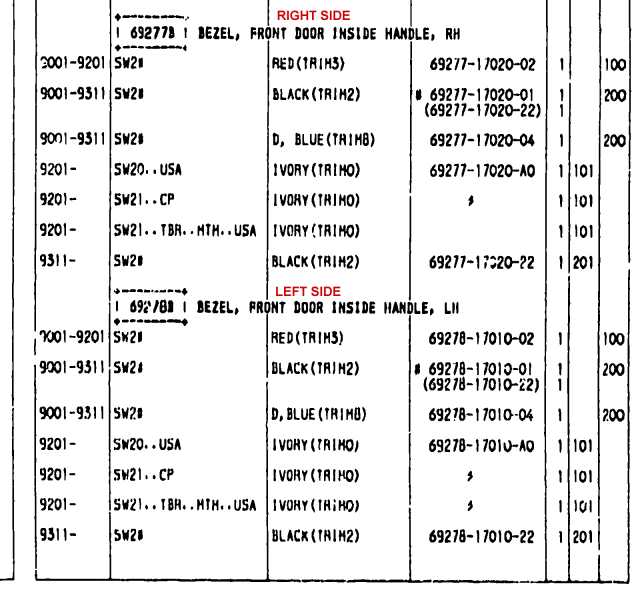
The above list was taken from the carfiche sw20 page , panel 4M7, to be exact. It seems at some point the black part was updated, perhaps with tougher/thicker plastic, but I can't be sure. I've seen both version of the parts and there's no obvious visual difference. Regardless, order the "-22" version. As of January '05, this was a special-order part, meaning you can't return it. Be sure to order the correct color and correct side (left or right).
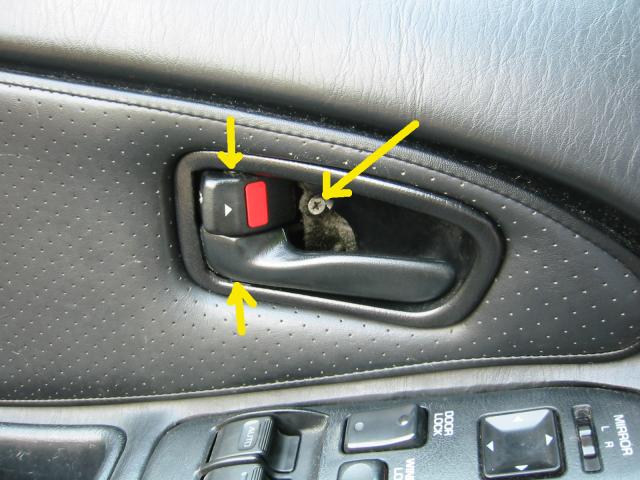
To remove the old bezel, first remove the screw shown below. The bezel can then be pulled free of the door latch. There's two pins you need to clear, indicated by the arrows. Push up on the top of the bezel and down on the bottom as you pull away from the door to clear these pins.
Note that on both bezels, I've had to file away some material from the upper rear corner to keep the door lock from binding. YMMV.
 Up to the top